¿Enfrenta un cuello de botella en su proyecto de pantalla integrada?
No permita que la integración compleja o los problemas de la cadena de suministro retrasen su tiempo de comercialización. Reserve una consulta gratuita con el equipo experto de RJY para obtener soporte personalizado en diseño y fabricación.
Cómo ahorrar dinero en hardware de señalización digital sin comprar el sistema equivocado
Publicado:
13 min read → 1. Lectura de 13 minutos
Actualizado:
Intentar ahorrar dinero en hardware de señalización digital no tiene que significar elegir el LCD, procesador o gabinete de menor precio. En muchos proyectos, los mayores costos evitables provienen de comprar especificaciones que la aplicación no puede utilizar, combinar componentes incompatibles o descubrir problemas de instalación después de que el diseño del hardware ya ha sido aprobado.
Un sistema de señalización digital con control de costos comienza con una comprensión clara del contenido, el entorno de visualización y el flujo de trabajo operativo. Una vez definidos estos requisitos, los desarrolladores pueden seleccionar una pantalla, placa controladora, solución táctil y estructura mecánica que sean suficientes para la tarea sin ser innecesariamente complejos.
Esta guía se centra en la señalización digital compacta e integrada, incluyendo pantallas de borde de estante, terminales de información de mostrador, pantallas de estado de habitaciones, pantallas de máquinas expendedoras, pantallas publicitarias integradas en electrodomésticos y otros sistemas de visualización comercial de pequeño formato. Los televisores comerciales de gran formato y las vallas publicitarias LED exteriores requieren una estrategia de compra diferente.
El hardware de señalización digital más barato no siempre es la opción de menor costo total
El precio unitario es visible de inmediato. El costo de integración no lo es.
Una pantalla de bajo precio puede parecer que reduce la lista de materiales, pero el ahorro puede desaparecer si el equipo de desarrollo necesita posteriormente una placa de conversión adicional, un cable diferente, un gabinete revisado o nuevo firmware. Problemas similares ocurren cuando se selecciona una placa controladora antes de confirmar la interfaz LCD y la definición de pines.
El presupuesto real de hardware puede incluir:
Módulo LCD y retroiluminación
Pantalla táctil y vidrio de cubierta
Placa controladora o host integrado
Adaptadores de interfaz, FPC y cables
Fuente de alimentación y cableado interno
Gabinete, herrajes de montaje y utillaje
Integración de firmware y sistema operativo
Revisiones de prototipos y trabajo de certificación
Mano de obra de instalación, piezas de repuesto y visitas de servicio
Ahorrar en un componente mientras se aumentan otras tres categorías de costos no es una reducción de costos efectiva. El objetivo debe ser simplificar el sistema completo y reducir la posibilidad de rediseño.
1. Defina qué debe mostrar la pantalla antes de seleccionar el hardware
El contenido determina el hardware. Una pantalla de estante que muestra precios y gráficos promocionales simples no tiene los mismos requisitos que un directorio táctil que reproduce video de alta resolución y recupera datos en tiempo real.
Antes de solicitar cotizaciones, defina:
Si el contenido es estático, animado o basado en video
La distancia de visualización esperada
Con qué frecuencia cambia el contenido
Si la pantalla opera de forma independiente o se conecta a una red
Si los usuarios necesitan tocar o interactuar de otro modo con ella
El número y tipo de interfaces externas requeridas
El espacio físico disponible para el LCD, controlador y cables
Esta información evita que los proveedores coticen un sistema innecesariamente potente simplemente porque el caso de uso real no está claro. También facilita la comparación de propuestas competitivas, ya que cada proveedor trabaja a partir del mismo resumen de aplicación.
2. Elija un formato de pantalla que se ajuste al contenido
Las empresas a veces seleccionan una pantalla rectangular convencional y luego construyen un gabinete grande a su alrededor, incluso cuando el contenido solo ocupa una porción estrecha de la pantalla. Esto puede aumentar el costo del LCD, el tamaño del gabinete, el volumen de envío y el espacio de instalación.
Una pantalla de tipo barra puede ser una opción más eficiente para promociones en el borde de estante, cabeceras de equipos, información de tránsito, mensajes direccionales o tiras publicitarias compactas. Una pantalla cuadrada puede adaptarse a un controlador de habitación o un producto de mostrador. Una pantalla panorámica convencional sigue siendo apropiada cuando la interfaz contiene texto más largo, varios elementos de menú o video.
El ahorro proviene de ajustar el área de visualización activa a la arquitectura de la información. La forma de la pantalla no debe elegirse puramente por novedad, pero una relación de aspecto no estándar adecuada puede eliminar área no utilizada y ayudar a reducir el tamaño del dispositivo completo.
3. No pague por una resolución que el espectador no puede aprovechar
Una mayor resolución es atractiva en una tabla de especificaciones, pero no es automáticamente más valiosa en el producto terminado. La resolución útil depende del tamaño de pantalla, la distancia de visualización, el diseño del contenido y el detalle visual.
Un aumento de resolución puede afectar más que el precio del LCD. Puede requerir capacidad adicional de procesamiento gráfico, ancho de banda de memoria, almacenamiento, optimización de software y energía. También puede reducir la cantidad de opciones de placas controladoras disponibles para el proyecto.
Si una pantalla presenta principalmente números grandes, iconos, logotipos o mensajes cortos, la interfaz puede no beneficiarse de una densidad de píxeles extremadamente alta. El mejor enfoque es probar contenido representativo a la distancia de visualización prevista y seleccionar una resolución que mantenga la interfaz clara sin sobrecargar el sistema.
La guía de RJY sobre Resolución LCD, píxeles y relación de aspecto explica por qué estos factores deben evaluarse en conjunto en lugar de tratar la resolución como una medida aislada de calidad.
4. Ajuste el brillo al entorno de instalación
El brillo es otra área donde la sobre-especificación puede elevar el costo del hardware. Un letrero interior instalado bajo iluminación minorista controlada no necesariamente requiere el mismo diseño de retroiluminación que una pantalla expuesta a luz solar intensa.
Las configuraciones de mayor brillo pueden afectar la retroiluminación, la fuente de alimentación, la gestión térmica y el gabinete. Seleccionar un objetivo de brillo sin evaluar el entorno real puede, por lo tanto, aumentar tanto el costo de los componentes como el trabajo de ingeniería.
Al mismo tiempo, sub-especificar el brillo es una falsa economía. Una pantalla que no puede leerse en su ubicación instalada puede necesitar ser reemplazada o reubicada.
Proporcione fotografías o información de iluminación del sitio de instalación cuando sea posible. Considere los reflejos del vidrio de cubierta, el ángulo de la pantalla, la distancia de visualización y si la luz solar llega directamente a la pantalla. El brillo debe tratarse como un requisito ambiental, no como un número de marketing.
5. Añada pantalla táctil solo cuando respalde una acción de valor
El táctil puede transformar un letrero digital en un directorio, terminal de pedidos, selector de productos o interfaz de servicio. Sin embargo, una pantalla táctil es innecesaria cuando los clientes solo necesitan leer un mensaje o ver contenido.
Agregar táctil puede introducir costos por el sensor, vidrio de cubierta, controlador táctil, adhesión, cableado, software y validación. El gabinete también puede necesitar soportar interacción pública repetida y limpieza.
Antes de agregar táctil, identifique la acción exacta que el usuario debe completar. Si la aplicación solo necesita acceso ocasional de técnicos, un botón de servicio oculto o un flujo de trabajo de gestión remota pueden ser más económicos. Si los clientes navegarán por productos o harán selecciones, el táctil puede justificar su costo al reemplazar botones físicos y permitir una interfaz configurable.
Para proyectos interactivos, el LCD, el sensor táctil, el vidrio de cubierta, el controlador y el sistema operativo deben revisarse como una sola configuración. El comportamiento final debe verificarse con el ensamblaje real en lugar de asumirse a partir de una especificación genérica de pantalla táctil.
6. Seleccione la placa controladora según la carga de trabajo, no por su reputación
Una placa controladora Android potente puede soportar video, redes, software de aplicación e interfaces sofisticadas. No es automáticamente la opción más económica para cada letrero.
Una pantalla simple que repite una secuencia fija de información puede necesitar menos recursos de procesamiento que un terminal táctil conectado. Por el contrario, un controlador con poca potencia puede crear problemas de reproducción, interacción lenta o trabajo adicional de desarrollo de software.
Defina la carga de trabajo requerida antes de elegir la placa:
Formato de imagen, animación o video
Resolución de reproducción objetivo
Complejidad del táctil y de la interfaz de usuario
Requisitos de red y periféricos
Sistema operativo y marco de aplicación
Método de almacenamiento y actualización
Funciones futuras esperadas
Adquiera un margen de rendimiento razonable cuando la hoja de ruta del producto lo requiera, pero evite pagar por interfaces y capacidad de procesamiento que la aplicación no tiene previsto utilizar.
La compatibilidad de la placa controladora no puede determinarse solo por la apariencia del conector. El modelo de panel, resolución, interfaz de visualización, definición de pines, temporización, retroiluminación, ruta táctil, firmware y entorno operativo deben verificarse. La Guía de compatibilidad de pantalla TFT LCD y placa controladora Android lista la información necesaria para esta revisión.
7. Reduzca adaptadores, placas de conversión y cables innecesarios
Cada capa de interfaz adicional agrega algo que comprar, montar, alimentar y probar. También puede crear otro conector que pueda aflojarse durante el transporte o el servicio de campo.
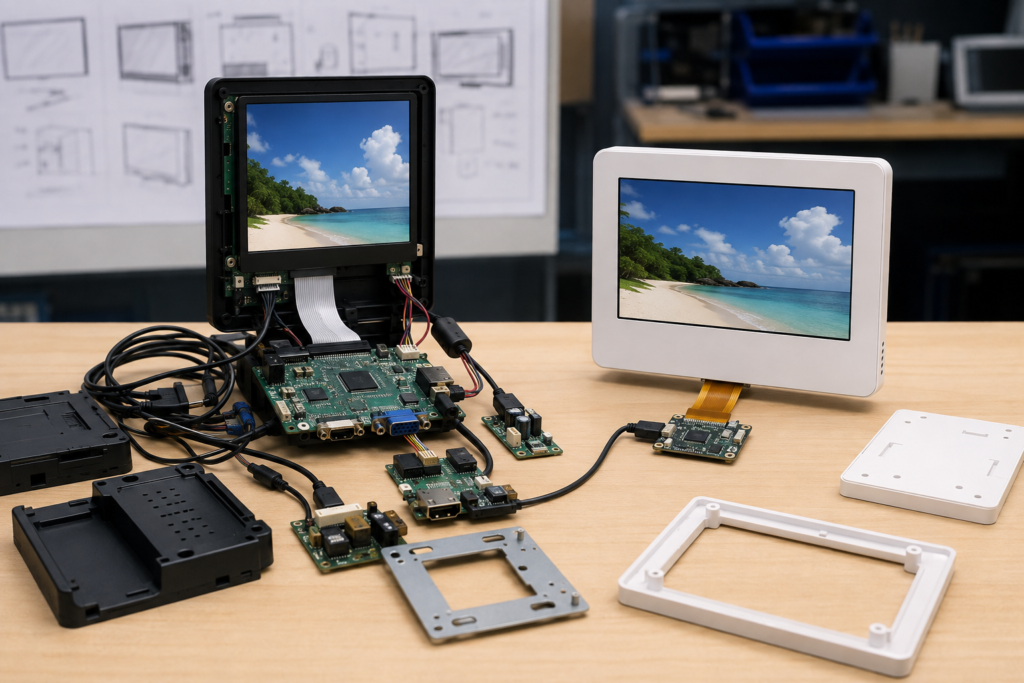
Para un prototipo temprano, usar un adaptador puede ser la forma más rápida de demostrar un concepto. Para un sistema de producción, el equipo debe determinar si el host y el LCD pueden conectarse a través de una arquitectura más limpia y específica del proyecto.
La configuración de menor riesgo depende del panel y del host seleccionados. MIPI, LVDS, eDP, HDMI y otras interfaces de visualización no son intercambiables, incluso cuando existen adaptadores. Una ruta de placa controladora debe confirmarse solo después de que la información real del LCD esté disponible.
RJY puede revisar configuraciones de controladores HDMI-a-MIPI y otras por proyecto. La Guía de compatibilidad HDMI a MIPI explica por qué la documentación del panel, los requisitos de retroiluminación y el firmware deben evaluarse antes de aprobar una placa.
8. Parta de una plataforma LCD existente
Un tamaño de panel completamente nuevo puede sonar como la mejor manera de lograr un producto único de señalización digital. En muchos proyectos compactos, también introduce costos de desarrollo evitables, requisitos de volumen y riesgo técnico.
Una ruta más práctica es a menudo seleccionar un módulo LCD existente y personalizar el ensamblaje circundante. Dependiendo del módulo y del proyecto, esto puede incluir:
Forma del vidrio de cubierta y borde impreso
Configuración de la pantalla táctil
Requisitos de retroiluminación
Dirección del FPC o disposición del cable
Adaptación de la placa controladora
Coordinación del firmware
Detalles del gabinete y montaje relacionados con la pantalla
Esta estrategia preserva una apariencia distintiva del panel frontal mientras evita la suposición de que cada producto necesita una nueva celda LCD o geometría de panel. También puede hacer que las muestras tempranas sean más representativas del diseño de producción previsto.
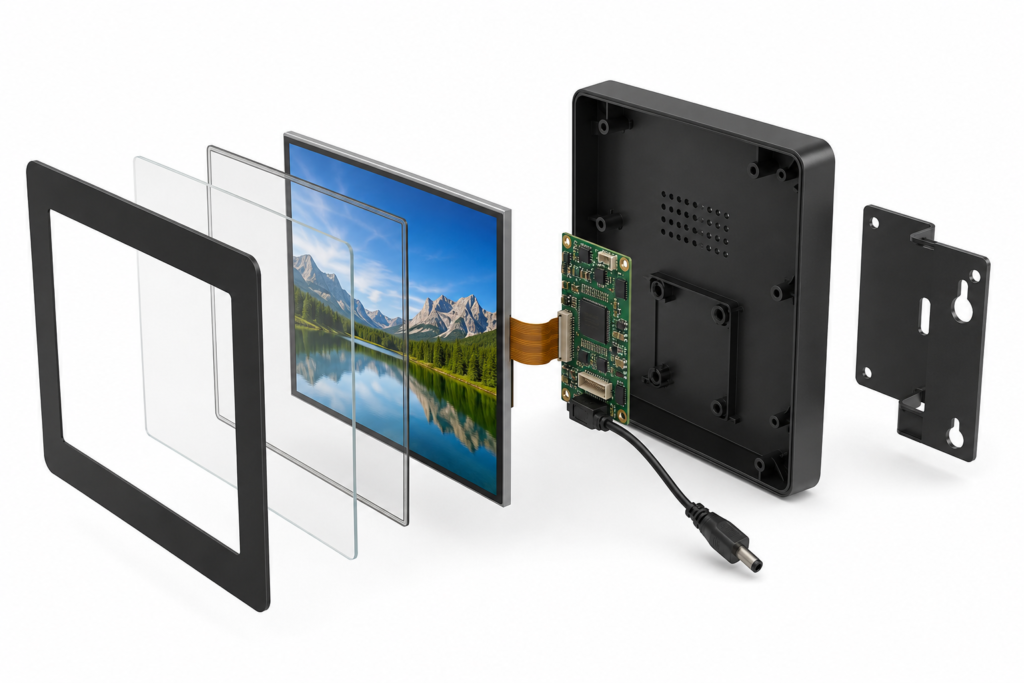
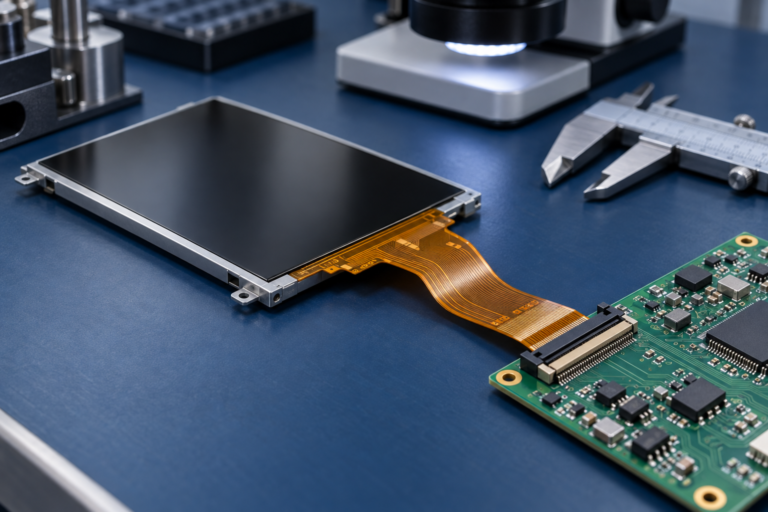
Ensamblaje despiezado de pantalla y controlador compacto de señalización digital
9. Estandarice el hardware en varios productos de señalización
Una empresa que opera varios formatos de señalización puede usar una arquitectura de pantalla y controlador para múltiples variantes de producto. La marca, el contenido y el comportamiento de la interfaz pueden entonces cambiarse mediante software o a través del diseño del vidrio de cubierta.
La estandarización puede reducir la cantidad de piezas de repuesto, documentos técnicos, cables y versiones de firmware que la organización debe gestionar. Los instaladores también se familiarizan con una arquitectura interna.
Esto no significa forzar una pantalla en cada gabinete. La estandarización funciona mejor donde el requisito de visualización, la carga de trabajo de contenido y las condiciones ambientales son similares. Una tienda puede usar una plataforma de hardware para varias pantallas de mostrador mientras mantiene una plataforma separada para unidades estrechas de borde de estante.
El ahorro debe medirse en compras, desarrollo, implementación y mantenimiento, no solo a través de un pedido más grande de un componente individual.
10. Diseñe la instalación y el acceso de servicio antes de la producción
Un letrero compacto puede seguir siendo costoso de instalar si los puntos de montaje son difíciles de alcanzar, los cables salen en la dirección incorrecta o si se debe retirar la carcasa para acceder a una conexión de servicio común.
Revise el entorno de instalación antes de fijar el diseño mecánico. Confirme:
Orientación de montaje y profundidad disponible
Posición de entrada de alimentación
Longitud del cable y espacio de curvatura
Requisitos de ventilación para el controlador
Acceso a funciones de almacenamiento, reinicio y actualización
Protección de la pantalla LCD, el FPC y los conectores
Cómo se retirará y reemplazará una unidad averiada
Unos minutos ahorrados durante cada instalación pueden ser significativos en un despliegue de múltiples ubicaciones. Más importante aún, un buen acceso de servicio puede evitar que los técnicos dañen componentes no relacionados al reemplazar una pieza.
Una lista de verificación práctica de costos de hardware para señalización digital
Decisión
Falsa economía común
Enfoque de control de costos
Tamaño de pantalla
Comprar una pantalla más grande de lo que el contenido requiere
Adecuar el área activa y la relación de aspecto al mensaje
Resolución
Elegir el valor más alto disponible
Probar el contenido real a la distancia de visualización prevista
Brillo
Usar un objetivo de exterior para cada instalación
Evaluar la luz ambiental, los reflejos y el ángulo de visión
Táctil
Añadir pantalla táctil sin una acción de usuario definida
Añadirla cuando la interacción genere un valor de producto medible
Controlador
Comprar el máximo rendimiento o seleccionar solo por el conector
Adecuar el procesamiento, las interfaces y el firmware a la carga de trabajo
Diseño personalizado
Suponer que se requiere un panel LCD completamente nuevo
Personalizar en torno a un módulo existente adecuado
Interfaces
Apilar múltiples adaptadores en el diseño de producción
Revisar la arquitectura panel-anfitrión desde el inicio
Mantenimiento
Ignorar el acceso hasta la instalación
Diseñar el montaje, el cableado y los procedimientos de reemplazo con antelación
Comparación de diseños de hardware para señalización digital complejos y simplificados
Cuándo gastar más por adelantado puede ahorrar dinero a largo plazo
La optimización de costos no siempre implica eliminar características. Algunas inversiones pueden reducir el gasto del ciclo de vida cuando resuelven un requisito verificado.
Una retroiluminación de mayor brillo puede estar justificada cuando la luz ambiental de otro modo haría ilegible el mensaje. Una cubierta frontal duradera puede reducir daños en un entorno público. Un rendimiento adicional del controlador puede valer la pena cuando funciones futuras de software ya forman parte de la hoja de ruta del producto. La coordinación del firmware puede prevenir un desajuste costoso entre la sincronización del LCD y la plataforma anfitriona.
La distinción es la evidencia. Gaste más cuando la aplicación, el resultado de la prueba o el plan de implementación respalden la decisión. Evite añadir especificaciones solo porque parezcan más sólidas en una tabla comparativa.
Calcule el costo total del hardware antes de aprobar el diseño
Una comparación útil debe incluir más que el precio del LCD y la placa controladora. Construya un modelo simple de costo total que cubra componentes, desarrollo, instalación y mantenimiento.
Para cada arquitectura candidata, compare:
Costo de pantalla, táctil y vidrio de cubierta
Costo de controlador, alimentación y cable
Costo de carcasa, herramientas y montaje
Esfuerzo de firmware e integración de aplicaciones
Requisitos de prototipo y validación
Tiempo de instalación por ubicación
Estrategia recomendada de unidades de repuesto
Proceso esperado de servicio y reemplazo
Este ejercicio a menudo muestra que el sistema más económico es aquel con menos piezas, compatibilidad más clara e instalación más sencilla, no necesariamente el sistema que contiene la pantalla individual más barata.
Cómo RJY respalda la señalización digital compacta con control de costos
RJY Display puede ayudar a los desarrolladores de equipos a revisar módulos TFT LCD compactos, conjuntos táctiles y opciones de placas controladoras para proyectos de señalización digital integrada. La adaptación de la placa controladora está disponible para pantallas seleccionadas de aproximadamente 1.28 a 15.6 pulgadas, según la resolución, la interfaz, el firmware y los requisitos completos del proyecto.
El soporte puede incluir existentes Selección del módulo LCD TFT, vidrio de cubierta, pantalla táctil, retroiluminación, FPC, interfaz, placa controladora, firmware y coordinación mecánica relacionada con la pantalla. Los módulos LCD y las placas controladoras también pueden discutirse por separado cuando el cliente ya tiene parte de la arquitectura del sistema.
La compatibilidad y el alcance de la personalización deben confirmarse a partir del panel real y la información del proyecto. RJY no trata una placa controladora como universalmente compatible con cada LCD, y la personalización no debe asumirse que incluye el desarrollo sin restricciones de un tamaño de LCD completamente nuevo.
Información que debe incluir en su solicitud de cotización de señalización digital
Para recibir una propuesta técnicamente significativa, proporcione:
Entorno de aplicación e instalación
Tamaño, forma y resolución de la pantalla objetivo
Tipo de contenido y distancia de visualización
Expectativas de brillo y ángulo de visión
Requisitos de pantalla táctil y vidrio de cubierta
Plataforma anfitriona, sistema operativo e interfaz de visualización
Hoja de datos del panel o modelo de referencia, si ya ha sido seleccionado
Restricciones de FPC, conector y carcasa
Requisitos de la placa controladora y del firmware
Cantidad de prototipos, demanda anual estimada y cronograma
Un resumen completo facilita la eliminación de hardware innecesario antes de que entre en el diseño. También ayuda a identificar problemas de compatibilidad mientras aún son económicos de corregir.
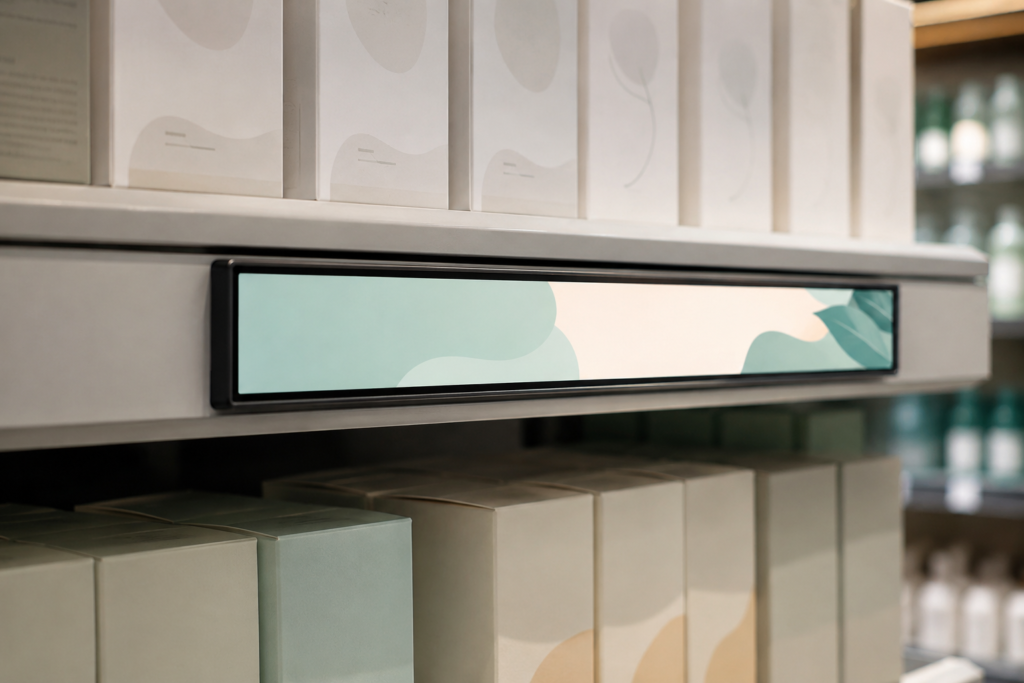
Señalización digital LCD de barra rentable integrada en un estante minorista
Construya un sistema de señalización de menor costo, no solo una pantalla más barata
La forma más confiable de ahorrar dinero en hardware de señalización digital es hacer que cada componente cumpla un propósito definido. Elija una forma de pantalla que se ajuste al contenido, una resolución que el espectador pueda aprovechar, un nivel de brillo adecuado al entorno y un controlador capaz de manejar la carga de trabajo real.
Luego simplifique la ruta de conexión, personalice sobre la base de un módulo existente y planifique la instalación antes de la producción. Estas decisiones pueden reducir la lista de materiales, así como disminuir el tiempo de desarrollo, los problemas en campo y el riesgo de rediseño.
Si está desarrollando un letrero minorista compacto, una pantalla de estante, un terminal de mostrador o una pantalla comercial integrada, explore las soluciones de pantalla personalizadas de RJY o contacte a RJY con sus requisitos de LCD, placa controladora, táctil y mecánicos para una revisión de ingeniería.
Preguntas frecuentes
¿Cuál es la mejor manera de ahorrar dinero en hardware de señalización digital?
Comience definiendo el contenido, el entorno de visualización y la interacción requerida. Luego seleccione únicamente el tamaño de pantalla, la resolución, el brillo, la capacidad táctil y el rendimiento del controlador necesarios para esa aplicación. Reducir componentes innecesarios y evitar rediseños puede ser más valioso que elegir la pantalla individual más económica.
¿Necesito una placa Android potente para cada letrero digital?
No. El controlador adecuado depende de la resolución de video, la complejidad de la interfaz, la red, el táctil, el software y las funciones futuras. Una pantalla informativa simple puede necesitar menos recursos, mientras que un terminal interactivo conectado puede justificar una plataforma Android más capaz.
¿Vale la pena siempre el costo adicional de una resolución LCD más alta?
No. El beneficio depende del tamaño de la pantalla, el detalle del contenido y la distancia de visualización. Una resolución más alta también puede aumentar los requisitos de procesamiento, ancho de banda y energía. El contenido representativo debe probarse antes de finalizar la resolución.
¿Puede una sola plataforma de hardware soportar varios diseños de señalización?
Posiblemente. Los productos con requisitos similares de contenido, rendimiento y entorno pueden compartir una arquitectura de LCD y controlador, utilizando diferentes software, vidrio de cubierta o carcasas. Cada configuración debe validarse para su instalación prevista.
¿Puede RJY proporcionar un LCD y una placa controladora juntos?
RJY puede revisar una solución combinada de LCD y placa controladora después de recibir los requisitos de panel, resolución, interfaz, definición de pines, retroiluminación, táctil, firmware y entorno operativo. Los módulos LCD y las placas controladoras también pueden discutirse por separado.
↗
¿Planificando un proyecto de pantalla?
Comparta el tamaño de su pantalla, resolución, interfaz, brillo, requisitos táctiles, requisitos de la placa controladora y el entorno de aplicación.
¿Aún no sabe qué pantalla se adapta a su proyecto?
Hable con el equipo de ingeniería de RJY para obtener asesoramiento sobre compatibilidad de pantallas, revisión de placas controladoras y discusión sobre personalización.